
Last updated November 17, 2026
 Tile roofing
 Architectural shingles
 Metal roofing
 GAF
 Owens Corning
 Flat & low-slope
Free roof inspection with deck photos before we talk money - GAF and Owens Corning certified installation
Tile Roofing Maintenance Schedule: What to Do and When
Concrete and clay tile can outlast the house underneath them. The felt underlayment they sit on usually can’t – in desert heat it typically gives out in 20 to 25 years, and most Paradise homeowners don’t find out until water shows up on a ceiling. We’ve pulled tiles off Paradise roofs where every single tile was still sound and the felt beneath had turned to dust. That’s the counterintuitive truth about tile: the part you see is the least likely part to fail. This guide gives you a dated, task-by-task calendar built around what you can’t see from the ground. Mention Paradise once, done.
Quick Answer
In Paradise, a tile roof needs visual inspection twice a year – once in late spring before the heat peaks and once in early fall after monsoon season – plus an underlayment assessment every few years and one from a licensed contractor once the roof passes 15 years old. The heart of the schedule is flashing and underlayment, not the tiles: valley flashing and pipe boots cause far more Paradise tile roof leaks than cracked tiles do. Skip the annual walks on the tile itself; those cracks are often caused by the inspection, not the weather.
Styles & brands we work with
- Architectural shingles
- Metal roofing
- Tile roofing
- GAF
- Owens Corning
- Flat & low-slope
Table of Contents
- Why the Underlayment Fails Before the Tile Does
- The Paradise Tile Roof Maintenance Calendar
- How to Inspect a Tile Roof Without Walking on It
- Flashing and Pipe Boots: The First Thing to Check
- What a Homeowner Can Do vs. What Needs a Contractor
- How to Log Maintenance for Warranty and Insurance
- Common Mistakes to Avoid
- Frequently Asked Questions
Why the Underlayment Fails Before the Tile Does
A tile roof is a two-part system. The tile sheds the bulk of the water, and the underlayment – the felt or synthetic sheet beneath it – is the actual waterproof layer. Tiles deflect; the underlayment seals. In a mild climate the felt can easily last 30 years. In Paradise’s heat cycles, where a roof surface can bounce from 60 degrees at dawn to 150 degrees by 2 p.m. and back again, that felt takes a beating. It dries, embrittles, and cracks. Once it tears, water gets underneath the tiles and travels along the deck until it finds a seam, a nail hole, or your ceiling.
The tile itself survives this cycle beautifully. Concrete and clay are fired hard and don’t care much about heat. That’s the trap: the roof looks perfect from the street while the layer doing the real work has already quit. Here’s what typically happens on a Paradise tile roof:
- Years 1 to 10: The underlayment is intact. Maintenance is about debris, flashing, and keeping water moving off the roof.
- Years 10 to 20: The felt starts to dry out and lose flexibility, especially on south- and west-facing slopes that get the most afternoon sun. Small failures show up at penetrations first.
- Years 20 to 25: The underlayment is at or past the end of its service life in desert conditions. Leaks become more likely with every monsoon.
- Year 25 and beyond: Even a roof that hasn’t leaked yet is running on borrowed time. A full underlayment replacement – lifting and re-laying the existing tiles – is usually the smart move.
The good news: if the tile is sound, you don’t have to replace it. A tile underlayment replacement costs a fraction of a new roof, and the original tiles get re-used. We’ve done this on Paradise homes where the concrete tile was 30 years old and still had decades left in it. If you’re weighing repair against replacement, our Roof Repair in Paradise page lays out how we decide.
The Paradise Tile Roof Maintenance Calendar
This is the schedule we actually use on Paradise tile roofs. It’s built around the Mojave year, not a generic four-season checklist. Each task lines up with the weather that causes the problem.
Late Spring (May to early June): Pre-Summer Heat Check
- Clear all debris from valleys and behind chimneys. The dry spring wind drops everything at once – seed pods, palm fronds, and the grit that builds up in valley flashing. That debris traps water and speeds up corrosion.
- Look for lifted or slipped tiles. From a ladder at the eave, scan for tiles that have slid out of line. Heat expansion over the winter can pop tile out of its course. A slipped tile is a direct path for water.
- Check the flashing at every wall and penetration. More on this below – it’s the single highest-priority item on the whole calendar.
- Confirm attic ventilation is working. A hot, poorly vented attic cooks the underlayment from below. If your attic runs hotter than the outside air, that’s a signal the felt is aging faster than it should.
After Monsoon Season (September to October): Debris and Flashing Inspection
- Inspect for wind-driven rain intrusion. Monsoon storms push water sideways, which is exactly the condition that finds bad flashing. Look for water stains on ceiling joists and around chimney and vent penetrations inside the attic.
- Re-clear valleys and gutters. Monsoon season dumps debris fast. That material sits in the valleys and holds moisture against the flashing.
- Check the fascia and drip edge. Wind-driven rain can work behind a compromised drip edge. If you see water staining on the fascia board, that’s a flashing or edge problem, not a tile problem.
- Photograph everything you find – see the logging section below. This is the inspection that most often produces insurance-relevant documentation.
Late Fall (November): Underlayment Assessment
This is the one task most homeowners skip, and it’s the one that matters most in Paradise. By late fall the weather has cooled enough for a contractor to get on the roof safely and take a hard look at the underlayment. We usually do this by lifting a few tiles at a discreet location – a valley, a hip, a spot near the ridge – and inspecting the felt directly. You’re checking for brittleness, cracking, and any sign the material has lost its flexibility. This assessment is worth doing every three to five years, and annually once the roof is over 15 years old. It’s also the right time to do a full inspection of the roof deck if you’re seeing any interior signs of moisture.
Winter and Early Spring: Watch and Wait
Paradise winters are mild, but they’re when water finds its way in most quietly. Cold nights and warm days create condensation under the tile, and any crack in the underlayment shows itself. Keep an eye on attic sheathing for dark staining through the winter. If you see it, don’t wait for spring.
How to Inspect a Tile Roof Without Walking on It
Here’s the part most maintenance guides get wrong: walking on a tile roof to inspect it can crack the very tiles you’re trying to protect. Concrete and clay tile are strong in compression but brittle under a point load. One careless footstep in the wrong spot can crack a tile, and a cracked tile is a future leak. The right way to inspect a tile roof is from the ground and from a ladder at the eaves – not from up on the tile itself.
Start with binoculars from across the street or from your backyard, at a distance where you can see the whole plane of the roof in one view. Then get to the eaves with a ladder for the up-close work. Here’s a simple numbered inspection you can do yourself:
- Binoculars from the ground: scan for missing tiles, slipped courses, and any visible gaps. Note the location of anything that looks off.
- Ladder at the eave (never climb onto the tile): look along the bottom edge for lifted tiles, broken pieces, and debris wedged under the first course.
- Check the valleys from the ground: look for dark streaks or debris buildup. A clean valley should be visible from below.
- Inspect from inside the attic: this is the best view you’ll get of the underlayment’s health. Look for water staining on the sheathing, daylight at penetrations, and any soft spots in the deck.
- Look at the flashing from a ladder: wall intersections, chimney saddles, and pipe boots are visible from a ladder at the eave on most single-story homes.
What you’re looking for and what you’re not: from binoculars and a ladder, you can spot missing tiles, obvious flashing gaps, and debris. What you cannot assess from the ground is the condition of the underlayment, the integrity of the deck, or hidden flashing problems behind the tile course. Those require a contractor on the roof – and that’s the honest line between a homeowner inspection and a professional one.
Flashing and Pipe Boots: The First Thing to Check
If we could only inspect one thing on a Paradise tile roof, it would be the flashing. More Paradise tile roof leaks trace back to failed valley flashing and cracked pipe boots than to broken tiles. Tiles are tough; the metal and rubber around the penetrations aren’t. Valley flashing takes the concentrated flow of every storm and sits right where debris collects. Pipe boots – the rubber collars around plumbing vents – crack and dry out in the sun faster than almost anything else on the roof. Valley flashing and boots are also where wind-driven monsoon rain hits hardest.
Here’s where flashing problems show up, in order of how often we see them in Paradise:
- Pipe boots: the rubber collar splits and lets water straight down the pipe. One of the most common and cheapest fixes on a tile roof.
- Valley flashing: debris traps moisture, corrosion sets in, and water works under the metal and into the underlayment.
- Chimney and wall flashings: the counter-flashing that seals the roof to a wall or chimney comes loose, often after heat expansion.
- Step flashing along sidewalls: individual pieces lift or separate, letting water track sideways under the tile course.
- Ridge and hip caps: the caps at the peak are exposed to the most wind and sun, and the mortar or fasteners can fail.
This is why we tell Paradise homeowners that the flashing-first inspection is the one that pays for itself. A pipe boot replacement is a small job. A leak that runs undetected for a season is a ceiling repair, an insulation replacement, and potentially a deck replacement. The same priority applies on the metal side of the trade – the details around penetrations and edges are where the workmanship shows – which is why we treat Metal Roofing in Paradise flashing details the same way.
What a Homeowner Can Do vs. What Needs a Contractor
There’s a real line here, and it’s worth knowing it before you climb a ladder. The consequences of getting a tile roof inspection wrong aren’t just a wasted afternoon. Tile roofs are genuinely dangerous to walk on – stepping between the tile courses can crack tiles you can’t replace individually, and a slip on a steep tile plane is a serious fall. That’s a job for someone trained to do it. The good news is there’s plenty of useful work a homeowner can do safely from the ground.
What you can legitimately do yourself:
- Keep gutters and downspouts clear of debris so water doesn’t back up under the eave tiles.
- Trim tree limbs back from the roof so branches don’t scrape tiles and drop debris into valleys.
- Photograph the roof from the ground with binoculars after every major storm.
- Inspect the attic from inside – staining, daylight, moisture – which is safe and genuinely useful.
- Check the flashing you can see from a ladder at the eave.
- Keep your maintenance log.
What needs a licensed contractor on the roof:
- Any inspection that requires walking on the tile itself – we do this with soft-soled boots and careful foot placement, and it’s still a trade skill.
- Underlayment assessment, which means lifting tiles carefully and re-laying them.
- Any flashing repair or pipe boot replacement that requires getting under the tile course.
- Anything involving the deck or sheathing.
- Any repair after a monsoon or wind event where tiles have shifted.
- Any leak you can’t find from inside the attic.
We’ll always be honest about which category your situation falls into. If a homeowner tells us what they’re seeing, we can usually tell them over the phone whether it’s a quick flashing fix or something that needs a full assessment. That’s what the free second opinion on any written estimate is for – you don’t have to take our word for it, or anyone else’s. Call us and we’ll tell you what we’d tell a neighbor.
How to Log Maintenance for Warranty and Insurance
A maintenance log is the least glamorous part of owning a tile roof and the most useful when something goes wrong. Two scenarios make it pay off. The first is a warranty claim: most tile roofing warranties – and the material warranties from GAF, CertainTeed, and Owens Corning – require documented maintenance. If you can’t show that the roof was inspected and kept clear, a manufacturer can deny a claim. The second is an insurance inspection after a storm. A dated log with photos tells an adjuster exactly what was done and when, and it supports the argument that any damage is storm-related rather than neglected.
Here’s what a useful log looks like. Keep it simple – a notebook or a folder on your phone is plenty:
- Date and season of every inspection.
- What was checked – and by whom. “Homeowner binocular inspection” and “contractor underlayment assessment” are two different things, and both belong in the log.
- What was found, with photos. Date every photo. Timestamped phone photos are hard to argue with.
- What was repaired, with the invoice or receipt attached.
- Who did the work, with their license number if they’re a contractor.
We keep a maintenance record for every tile roof we work on, and we’ll hand you a copy of the findings after every inspection. That’s not a service you’ll get from a storm chaser who’s in town for two weeks. When you have a real local roofer, the paperwork follows the roof.
If you’re looking at a full replacement rather than maintenance, our Roof Replacement & Installation in Paradise page walks through how we handle a tile re-roof and what to expect from the timeline. And if you want the wider picture of how we work in Paradise, start at the Shepherd & Sons Roofing Paradise home page.
Common Mistakes to Avoid
- Walking on the tile to “check” it. This is the number one mistake we see. Homeowners crack more tiles inspecting the roof than any storm ever does. Stay off the tile and inspect from the ground and the ladder.
- Replacing the whole roof when only the underlayment failed. If the tile is sound, a tile underlayment replacement saves you most of the cost of a new roof. Get a second opinion before you sign a full replacement contract.
- Ignoring flashing because the tile looks fine. The tile looking perfect is exactly why flashing failures go undetected until there’s a ceiling stain. Check the boots and valleys every year.
- Skipping the post-monsoon inspection. The monsoon is when water gets in, and the weeks after are when you can still catch it cheaply. Wait until winter and the damage has had time to spread.
- Hiring a storm chaser who showed up after a hailstorm. The out-of-state crews that follow every storm aren’t around to honor a warranty in two years. Ask for a local address and a license number you can look up.
- Not documenting maintenance. No log means no warranty support and a weaker insurance claim. It takes five minutes to write down an inspection, and it can save thousands.
- Letting debris sit in the valleys. That material holds moisture against the flashing and speeds corrosion. Valley cleaning is the cheapest maintenance on the whole calendar.
See the difference
 Before
 After
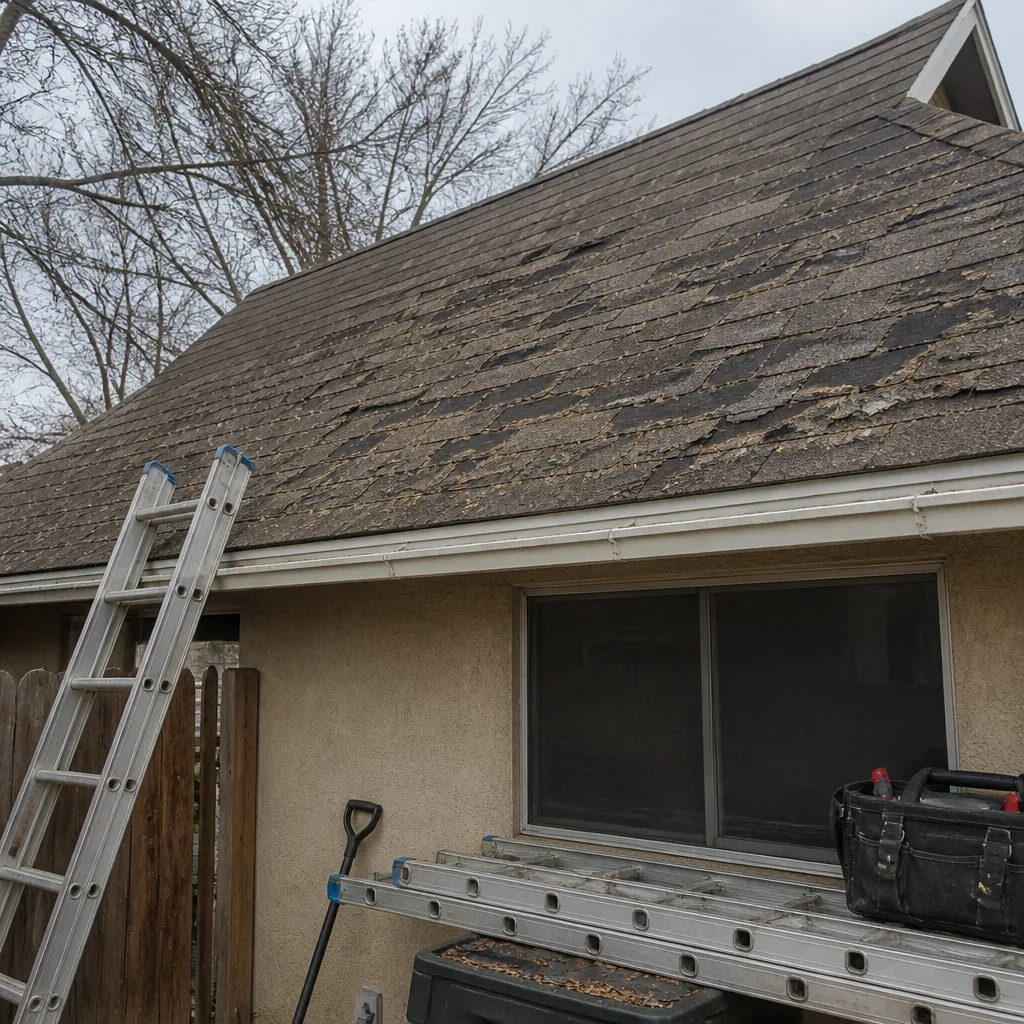 Before
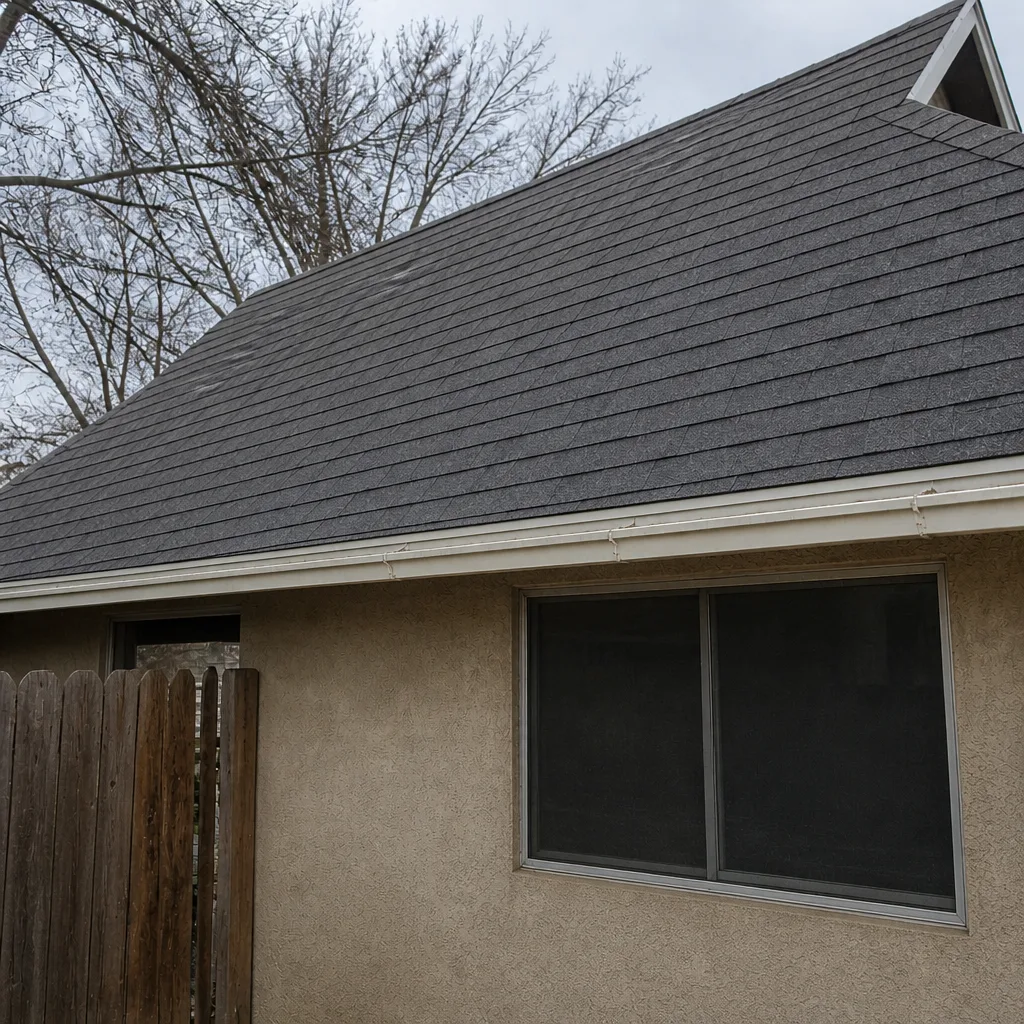 After
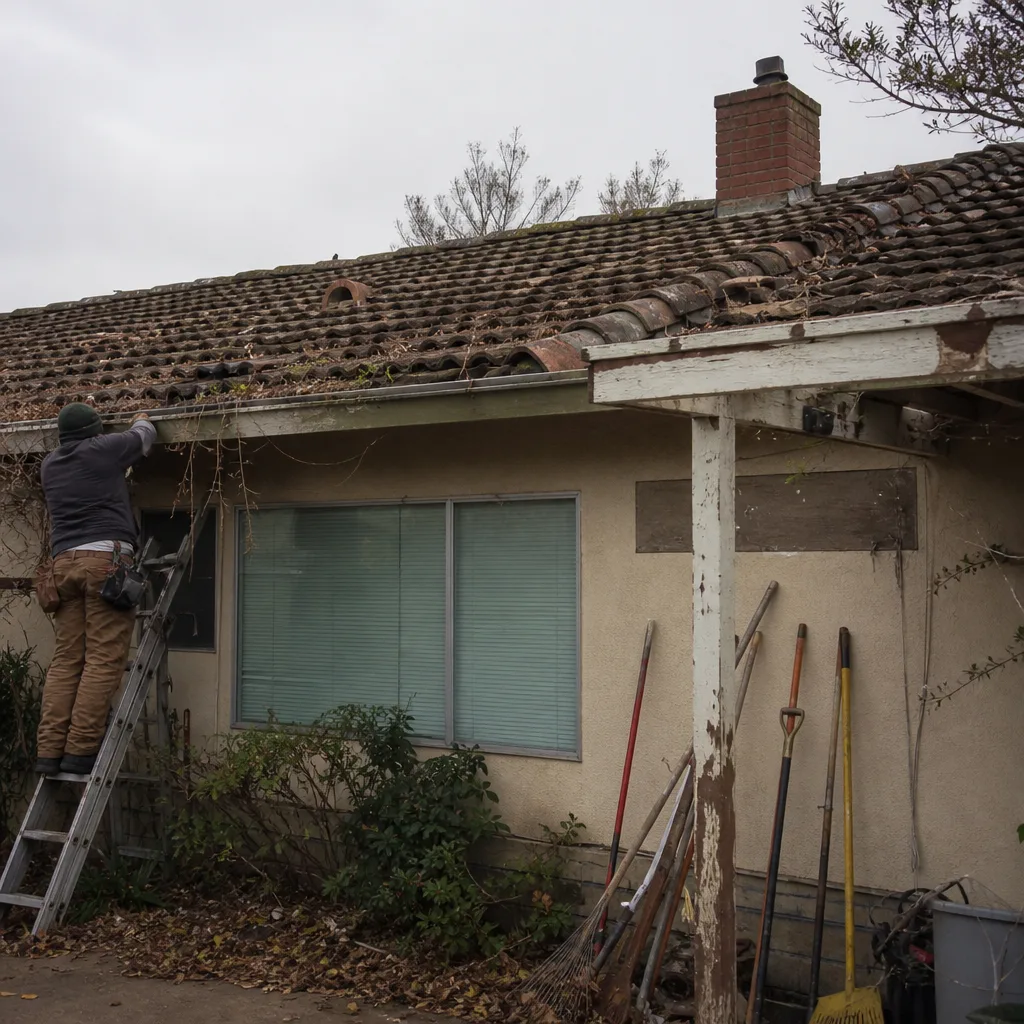 Before
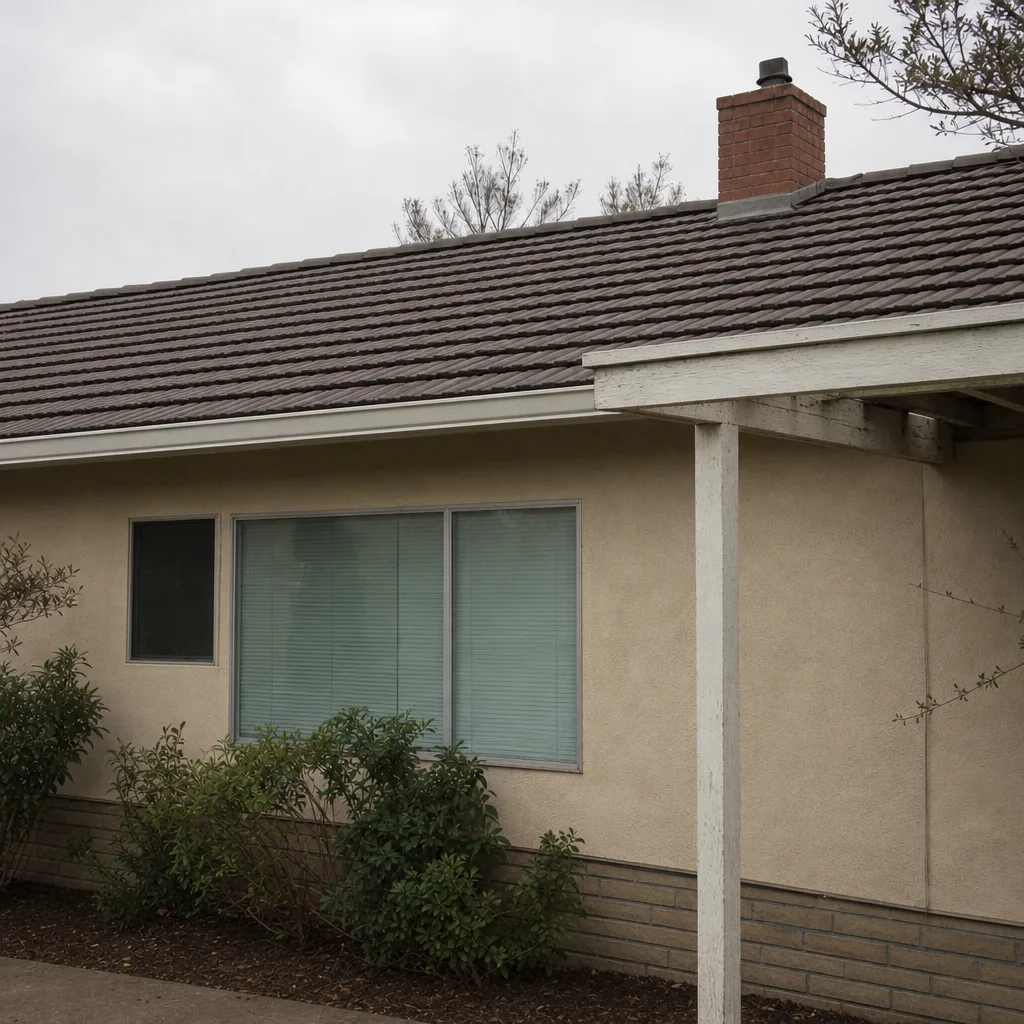 After
When to Call a Professional
Call a licensed roofer when you see water staining on a ceiling or attic sheathing, when tiles have shifted or gone missing after a wind event, when you can see cracked or separated flashing from the ground, or when your tile roof is 15 years old or older and hasn’t had an underlayment assessment. Call before you climb – tile roofs are dangerous to walk on, and a slip is not worth it. If you’re not sure whether your situation is serious, call anyway; we’d rather tell you it’s nothing than have you find out the hard way. Shepherd & Sons Roofing Paradise offers free estimates in Paradise – call (833) 676-0557 to schedule one.
Frequently Asked Questions
A tile roof in Paradise should be visually inspected twice a year – late spring before the heat peak and early fall after monsoon season – with a professional underlayment assessment every three to five years, or annually once the roof is over 15 years old. Flashing should be checked at every inspection, and valleys and gutters cleaned before summer and after the monsoon. Call (833) 676-0557 for a free estimate if it’s time for your inspection.
Tile roof underlayment typically lasts 20 to 25 years in desert heat, which is far shorter than the tile on top of it. The tile itself can last 40 to 50 years or more, but the felt beneath it dries out and cracks from heat cycling and sun exposure. Once the underlayment fails, the roof leaks even though the tile looks fine. Call (833) 676-0557 to schedule an underlayment assessment.
No – walking on a tile roof to inspect it can crack tiles and is a genuine fall risk. Concrete and clay tile are brittle under a point load, and one wrong step can crack the tiles you’re trying to protect. Inspect from the ground with binoculars, from a ladder at the eave, and from inside the attic instead. Anything that requires getting on the tile should be done by a licensed contractor. Call (833) 676-0557 for a professional inspection.
Failed flashing causes most tile roof leaks in Paradise – pipe boots and valley flashing in particular – not broken tiles. Pipe boot collars crack in the sun, and valley flashing corrodes when debris holds moisture against it. Both allow water under the tile and into the underlayment. Checking these first is the most efficient way to protect a tile roof. Call (833) 676-0557 for a free estimate on any flashing repair.
No – if the tile is still sound, you can replace just the underlayment and re-lay the existing tile at a fraction of the cost of a new roof. This is one of the most common jobs we do on older Paradise tile roofs, and it can add decades to the roof’s life. A second opinion on any full-replacement quote is worth getting before you commit. Call (833) 676-0557 for a free second opinion.
Maybe – most tile roofing warranties require documented maintenance, so a leak from neglected flashing or a failed underlayment may not be covered. Material warranties from manufacturers like GAF, CertainTeed, and Owens Corning often require proof of regular inspections and clearing. A dated maintenance log with photos is your best protection. Call (833) 676-0557 for a free estimate and we’ll help you document what you have.
The Bottom Line
The tile on your Paradise roof is probably not the problem. The felt under it and the flashing around it are, and that’s why the maintenance schedule matters. Inspect twice a year from the ground and a ladder, never from on top of the tile. Check flashing and pipe boots first at every inspection. Get a professional underlayment assessment every few years and annually after your roof hits 15. Keep a dated log with photos. And when you need a real look at the parts you can’t see, call a local roofer with an address and a license number you can verify. The tile will outlast the house. The rest needs a little attention.
Shepherd & Sons Roofing Paradise offers free estimates in Paradise – no trip charge inside the county, no-hassle upfront pricing, and a free second opinion on any written estimate. We install tile and shingle products from GAF, CertainTeed, and Owens Corning, and every job is backed by our written 90-Day Done Right Promise. Call (833) 676-0557 to schedule your free estimate.
Written by the team at Shepherd & Sons Roofing Paradise.